Lounging under an outdoor pergola with a cold drink in hand and enjoying the breeze is the ultimate patio living experience. Many people dream of creating their own outdoor space, which often includes building a pergola. Follow this step-by-step guide to making your pergola sturdy, practical, and comfortable.
Why Build a Pergola?
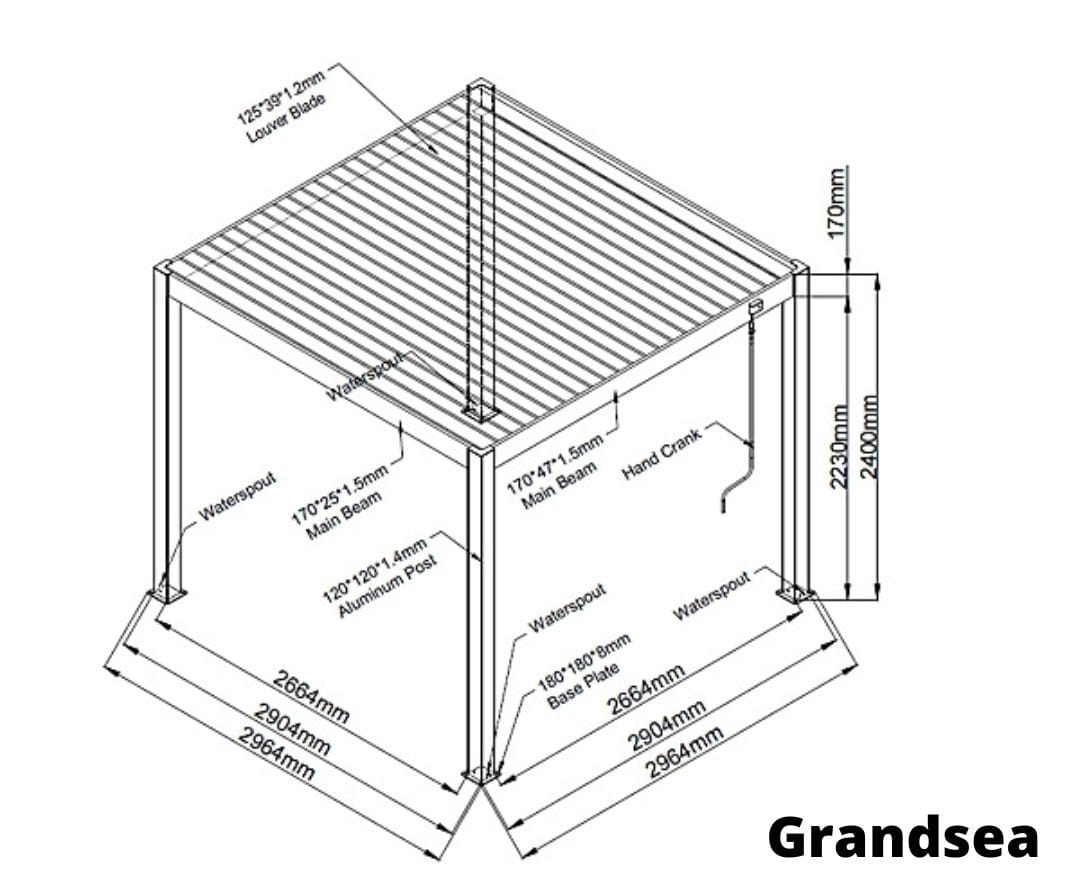
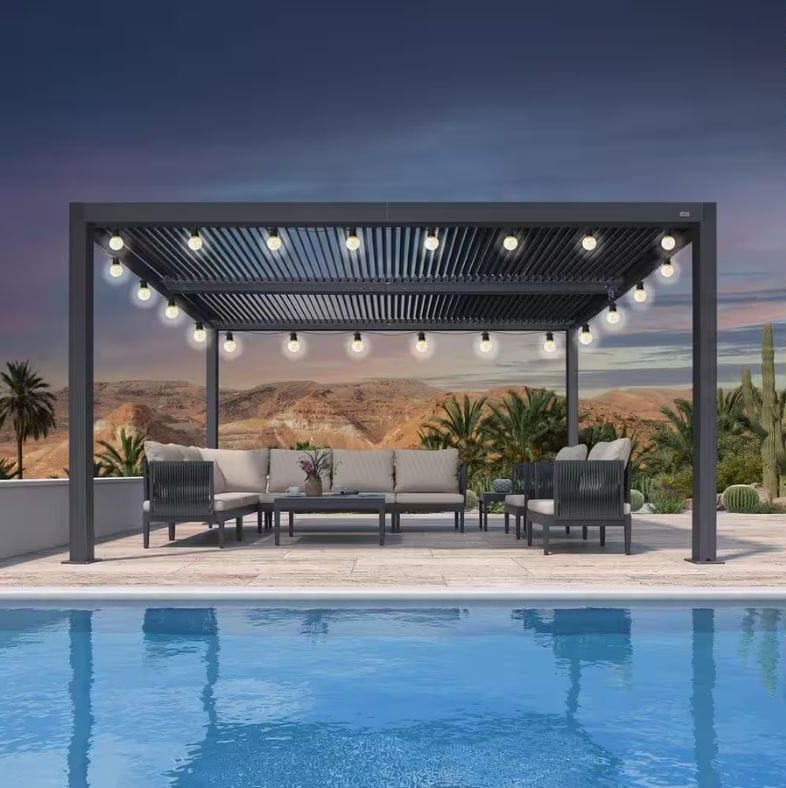
Aluminum louvered pergolas stand out among pergola styles due to their sleek appearance and practical features, transforming your backyard into an elegant retreat. Barbeque? Pool? No matter what your preferred outdoor activity is, adjustable roof louvers offer the flexibility to accommodate it all! Perfect for creating some neighborhood jealousy.

Step-by-Step Guide: Building a Pergola for Beginners
1. Pergola planning
Before you say goodbye to your Saturday, let’s talk planning. Start by asking: how big do you want your new outdoor HQ? Prepare with sketches, precise measurements, and even create a Pinterest popular event List for inspiration.
- Measure your space: Mark out your ideal footprint. For most patios, 10x12ft makes a cozy oasis.
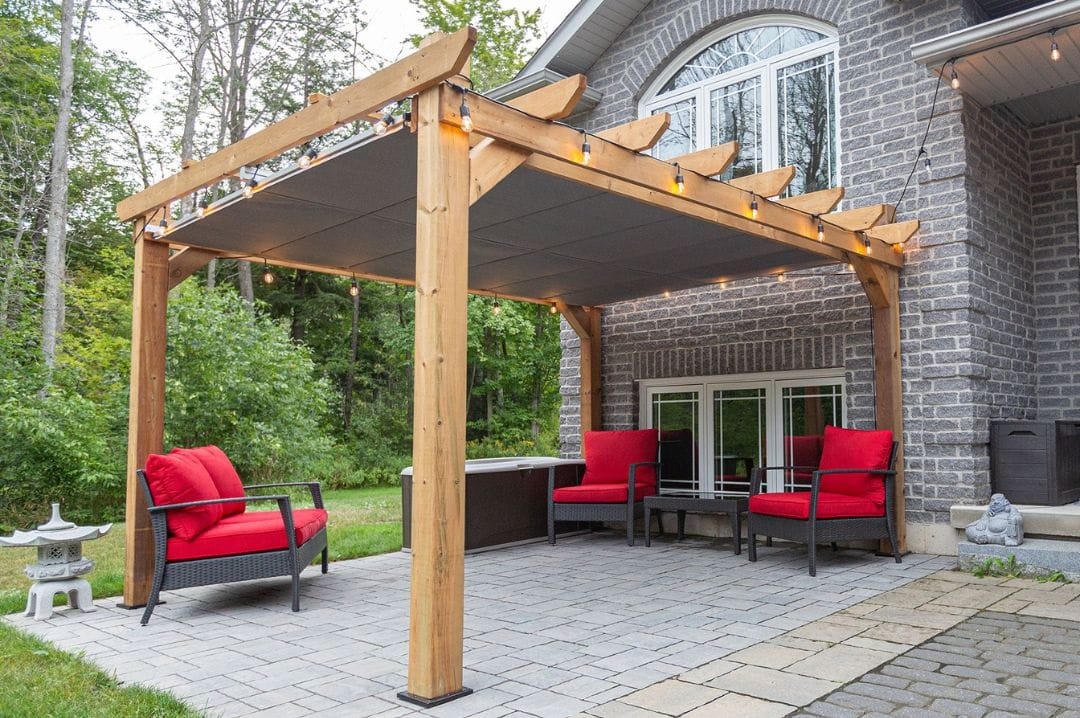
- Choose your style: classic wood or sleek aluminum. Feel free to get creative, but keep in mind that wood exudes timeless charm, aluminum represents modern fashion.
- Check codes and permits: Avoid that awkward “stop work” notice by checking local regulations.
Insert image of hand-sketching a pergola with tape measure and coffee cup here.
2. Materials
Bring this list to your favorite hardware haunt (or, if you’re a pro, to that mysterious “garage stash.”):
| Material | Typical Amount Needed | Notes |
| 6×6″ pressure-treated posts | 4–6 | Foundation of your pergola |
| 2×8″ beams & 2×6″ rafters | As per design | Rafters create that dreamy grid |
| Post brackets/anchors | 4+ | Especially crucial on concrete |
| Concrete mix | 2–4 bags per post | Lock those posts (and your dreams) |
| Galvanized bolts and screws | A handful (or two) | Stainless = fewer future regrets |
| Outdoor wood stain/sealer | 1 gallon | Looks good, lasts longer |
3. Building the Base: Posts for Any Surface
Dirt or Lawn:
- Dig holes 2ft deep.
- Insert the posts and ensure they are perfectly level using a spirit level.
- Fill with concrete.
Concrete Patio:
- Mark post locations.
- Drill holes and attach post brackets with wedge anchors.
- Insert and secure posts.
How to anchor pergola posts to concrete
4. Adding Beams and Rafters: The “Skeleton” of Your Pergola
- Attach horizontal beams to all posts with heavy-duty brackets/bolts.
- Mark evenly spaced positions for the rafters on your beams
- Install rafters with lag bolts or screws.
- Style tip: Allow some rafters to overhang to create a polished, professional look.
If you want a roof, now’s the time! Go with corrugated plastic, wood slats, or shade fabric for the right blend of sun and shelter.
5. Final Touches: Make It Yours
- Stain or seal to protect against sun and storms.
- Add string lights, hanging plants, or outdoor curtains to enhance comfort and ambiance.
- Dust off your lounge chair and enjoy.

The Cost to Build a Pergola
Let’s talk numbers, because—trust me—your wallet deserves a say.
| Pergola Size | DIY Cost (avg.) | Pro Installed (avg.) |
| Small (64 sq ft) | $1,280–$3,840 | $2,000+ |
| Medium (100 sq ft) | $2,000–$6,000 | $4,000–$6,400 |
| Large (144 sq ft) | $2,880–$8,640 | $5,000+ |
Pro tip: DIY builds can be done for $1,000–$3,000 if you keep materials classic and simple!
Popular Pergola Builds: FAQs Sneak Peek
Can I build a pergola on concrete?
- Absolutely! Use anchor brackets and concrete wedge bolts to ensure maximum stability.
What about a pergola with a roof?
- Yes, just add sloped rafters and top with corrugated panels or your favorite shade material. Perfect for all-weather chilling!
Is it tough to build a pergola attached to my house?
- Not if you can handle a drill and some lag bolts. Secure your ledger board to the studs, and flash for water protection.
How much does it cost?
- DIY: $1,000–$3,000. Professional install: $2,000–$6,400+ (materials drive cost up or down).
Is this a project for beginners?
- 100% yes! Grab a tool belt, bribe a buddy, and follow basic steps. You learn by doing.
Table: Basic Steps to Build Your Own Pergola
| Step | What to Do | Key Tools |
| Plan & Measure | Mark location | Tape measure, line |
| Buy Materials | Get all supplies | Shopping list, truck |
| Set Posts | Dig or drill then anchor | Shovel, hammer drill |
| Add Beams & Rafters | Assemble frame | Saw, drill, level |
| Finish & Decorate | Stain and accessorize | Brush, lights, plants |
Pro Tips For a Chic Pergola
- Mix modern style with natural finishes—think black beams with cedar rafters.
- Install dimming LED string lights: instant “wow” at night.
- Use outdoor curtains for privacy or extra drama.
- Go vertical! Train climbing roses or wisteria for that “secret garden” feel.
Conclusion & Call to Action
Are you ready to transform your ordinary backyard into an extraordinary space filled with style, comfort, and outdoor enjoyment? Begin planning, gather your tools, and get started today! For easy assembly of a pergola kit you can purchase one directly from Grandsea as one of their premium manufacturers.
What are you waiting for? Your backyard deserves an upgrade!